Great Free Plug-in for Lightroom – The Fader!
This week I was reading Matt Kloskowski’s Lightroom Killer Tips blog (the best blog around for Lightroom fans) about a new plug-in called “The Fader.” In Matt’s words, “….it does exactly what it says. It fades presets. If you’ve ever applied a preset and like the effect, but just think it’s a little “too much” then that’s where The Fader comes in (insert deep echoed breathing here). You pick a preset and then move the slider to tone it down a bit. That’s it.” I decided to give it a try. I found out that sometimes it is better to apply the effect even more than what the basic preset allows. Since this turned out to be a major cool plug-in, I wanted to share some of my results using the program. Here is The Fader link to download the plug-in or download it from Adobe Lightroom Extension. So lets get started.
To find The Fader in Lightroom, you must go to File > Plug-in Extras > The Fader. The plug-in has a slider that allows you to set the preset strength anywhere between (-50) and +150. The preset is actually applied from within the plug-in first by selecting the file folder containing the preset in one field, and then choosing the preset from a drop-down list of the folder presets in the next field. Any number of presets can be tried (just like looking at the Navigator in Lightroom) before you decide on a preset. Below I am showing just a simple example for comparison of what results you get with no preset applied, the regular preset applied at 100%, and the preset applied using The Fader set to 85%. For the last two images, I used a preset that comes with Lightroom when purchased called Color Creative – Yesteryear 1. For all images in this blog I did basically no processing of the images except for the presets shown and a bit of vignetting in some cases.
With the last image at 85% strength, there is a little less of that fake turquoise look but still has a bit of that old-fashioned feel in the image.
Next are three images which show, once again the original image first, then one with 100% strength of the preset applied, and finally one with 150% strength applied (the maximum that can be applied). I used a preset called Vivid Drawing Look that I created and can be downloaded here.
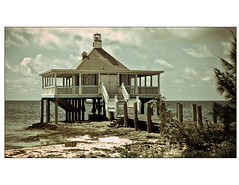
In this case, the image at 150% strength has a better look in my opinion. The photos below are of Wrecker’s Bar in the Bahamas. First the original, then one at 100% preset strength, 121% preset strength, and one at (-31) preset strength. I used the preset from Presets Heaven called YoshkiWarmGold. This site has fabulous presets for free download and may be the second best site next to Matt’s for Lightroom.
The negative setting created really stong blue and green tones – it seems the negative numbers bring out some very different results depending on the preset. I am not sure I like the blue but this is a good example of how different the same preset can make an image look at various strengths.
The final images are just a reiteration of what is above, but the effect is really nice in all cases. It just goes to show that if the image is photographed correctly, it is hard to make it look bad no matter what you do to it! This is an image of the Bank of Scotland’s dome in Edinburgh, Scotland. The first image is as shot in raw, the second used 100% strength of Matt’s 70’s Look, and the final image is of the same preset at 150%. This preset was created in Episode 227 of Photoshop User TV and is slightly different from the Vintage presets he has on his site. I really like this preset and use it often – if you want a copy, I have it posted here.
I believe I will use this plug-in all the time – it opens up a whole lot of new possibilities for effects in images. I hope the Adobe people will consider doing just what The Fader does in their next version of Lightroom. I would recommend you download and try this program for yourself. I think you will be surprised at how easy it is to use and how interesting the effects can become. Enjoy!…..Digital Lady Syd


Pingback: Artizen Dramatic « Mike Hardisty Photography
Pingback: New Plug-In for Lightroom « Syd Johnson's Blog
Thank you for the great review of the Fader tool. I am more comfortable downloading it now that I have seen what it can do.
05/10/2011 at 1:11 pm
Pingback: Same Image – Different Look! « Syd Johnson's Blog
Pingback: Storytelling with Your Images « Digital Lady Syd's Fun Photoshop Blog
Pingback: 2012 Inexpensive Gifts for the Photoshop Lover on Your List « Digital Lady Syd's Fun Photoshop Blog
Pingback: Texture Resources – So Many Choices! So Many Choices! | Digital Lady Syd's Fun Photoshop Blog
Pingback: Adobe Lightroom 5 Features | Digital Lady Syd's Fun Photoshop Blog
Great review and the results. I would try the Fader too. The first link for download shows error 404, but I will try the Adobe link later.
11/04/2018 at 11:23 am
Hi Inese – You found one of my oldie but goodie blogs from a long time ago. Afraid I have not updated all the bad links. Well The Fader link is now updated and it appears to be a free download. I still find this add-on quite useful! Thanks for the heads up on the link.
11/05/2018 at 11:24 am
Thank you! It is a great tool! Saves so much time as we usually have to adjust the results anyway. Adobe link worked perfectly, so no problem with that. It is impossible to go back and update links 🙂
11/05/2018 at 1:59 pm