
PLACING ANY PHOTOSHOP GENERATIVE FILL VARIATION ON A LAYER EASILY
Just wanted to blog out another pretty cool Photoshop AI trick so that you can work on numerous variations at the same time in the same or in different files. Learned this from Aaron Nace, another really great Photoshop guru that always has lot of tips and tricks to share.
Once you have run the Generative Fill command in Photoshop, there is a way to add each variation onto its own layer and it very simple.
- Highlight the variation you want to place on its own layer.
- Create a New Layer above the Generative Fill AI layer and highlight it.
- Go to Image -> Apply Image. Just use the default settings. Okay.
Now the variation is on its own layer. As long as you have the variation you want on its own layer showing up in the Properties Panel, an image can be made quickly and you can make several layers from the same Generative Fill variations.
This can be very useful, especially if you want to combine two variations into one image. Sometimes you like a sky area in one variation but not the foreground for example. Just run this for each variation and you will find a new layer for each variation in your Layers Panel. Just add a layer mask to one and remove what you do not want to see. And you can put your main subject into different backgrounds by selecting the subject and inverting it – then run all kinds of backgrounds and having different files to put in a screenshow. That is what Aaron did.
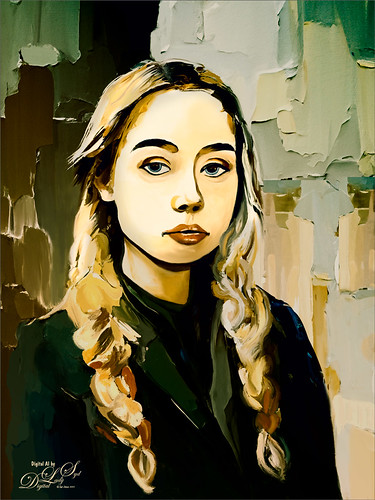
The girl above is another variation from my selfie image (Dave Kelly’s free Gen Fill Photo Painting Action set to GF Painting 40 and Generative Fill Prompt: Oil Painting). Put her on her own layer – then created a New Document to do my painting and adjustments to the image. Used four brushes – two Regular brushes: I like Kyle’s new Fall 2023 brush Great Brush (changed Flow to 54% and Smoothing to 12% in the Options Bar) using a small size for adding clumps of color, and Grut’s Watercolor Late Never brush adjusted for smoothing like on her face (for settings, check the Brushes Used on These Images at the end of my Creating an AI Selfie? blog – also more variations from this same selfie image).; and two Mixer Blenders: still using David Belliveau’s free Mixer blender at 15 px, and an older Fay Sirkis Mixer brush called Short Streaky Detail Blender (not sure it is available any more) – any small detail brush mixer would probably work to get the hair look. It is important that you find a few brushes to use for painting clean up on these AI files – they generally are pretty rough.
Well, this was short and sweet but I thought it might be useful to you when trying to figure out how to be creative with this new AI capability. …….Digital Lady Syd

Pingback: » A Sophisticated Model Digital Lady Syd's Tidbits Blog
Pingback: CREATING AN AI SELFIE? | Digital Lady Syd's Fun Photoshop Blog
Pingback: A FEW NEW SELFIE AI TRICKS | Digital Lady Syd's Fun Photoshop Blog
Pingback: » Sailor Selfie Digital Lady Syd's Tidbits Blog
Pingback: » At the Lake Selfie Digital Lady Syd's Tidbits Blog
Pingback: » AI Selfie Enjoying the Winter Wonderland Digital Lady Syd's Tidbits Blog
Pingback: CREATING GOLD USING UPDATED BETA AI IMAGES | Digital Lady Syd's Fun Photoshop Blog