
USING A 50 MM LENS AS A MACRO LENS – REALLY?
 Hi Everyone – just doing a quick post this week on an interesting camera trick I had never tried. I read about this in an article called 5 Awesome Benefits of Using a 50 mm Lens by Jason D. Little at Light Stalking – they have great articles on all types of Photography topics. What is done is to take the 50 mm lens off the camera and hold it up backwards so the image is shot through the front side of the lens.
This technique does not replace a good macro lens by any means, but it is kind of fun to try. And if you do not own a Macro Lens, give it a go. I did not have an adapter or reversing ring to attach the lens to the camera (these apparently are very inexpensive to buy) – and I did not use a tripod with a remote trigger. I imagine some really good results can be created by doing this. Because of this, it gave my images a very soft abstract feel – it actually reminded me of my Lens Baby effects. And for me it was a good starting point for doing some more artistic effects.
It took me a while to actually get some camera settings that worked and lots of lights were turned on in my home. An ISO setting of 800 seemed to work best for me. None of the automatic settings worked since no lens was actually attached to it. Therefore the focus had to be adjusted manually by moving in closer or further away with the camera itself. As you can see, it becomes a very close up macro effect. The post-processing took lots of time to get a good effect – started with my Another Simple Black and White Technique blog from last week and then added a couple textures along with several adjustment layers.
The next two images are both from a Blowing a Kiss Sculpture and is part of the Vitruvian Sculptor Collection based on Leonardo Da Vinci’s Vitruvian Man drawing. I enjoyed creating both of these images. The smile image, as with all three image, required a lot of Spot Healing to remove the dark dust marks from the lens. Also, they all were rather noisy so some adjustments were done in Lightroom’s Detail Noise Reduction Panel.
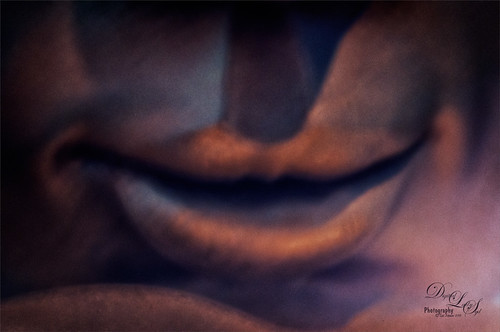 To get the interesting colors, the oldie-but-goodie Nik Color Efex Pro 4 with several filters (Reflector Efex, Film Efex Nostalgic, Darken/Lighten Center, Detail Extractor, Photo Stylizer, Vignette Lens, and Classical Soft Focus) was used. Then a Levels Adjustment Layer and a Color Lookup Adjustment Layer using the filmstock_50 preset at 52% layer opacity were applied. Pretty simple post-processing.
******
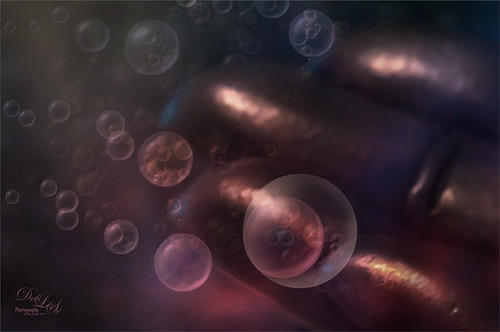 The above image took a little more effort but I really liked the way the bubbles looked in the final iteration. Two groups of bubbles with several layers each were added – smaller sized ones for the background and larger ones for the actual fingertips. All the bubbles in this image were created using a Lisa Carney Bubble brush she shows you how to create in her Filters and Smart Object class on Creative Live (all her classes are fabulous). Brush 11 in the free Photoshop Bubble Brushes would have worked just as well and was used as the foreground bubble. To create a group of bubbles, need to adjust the size, spacing and scattering in the Brush Settings Panel and just paint them in on a New Layer. A light border was added, a pink and blue texture overlay, and a Light Beam Brush by Jonas de Ro was added in the upper left. Then just my final workflow using a Black and White Adjustment Layer set to Luminosity blend mode and Nik Viveza 2 layer were added.
I am not sure I would use this technique unless I needed a macro shot and this is all I had available. It can be done but it does take a lot of experimentation. Hope you all have a great week….Digital Lady Syd

I absolutely LOVE these, Syd!
So interesting, and I love the wonderful softness and colors.
01/15/2018 at 4:22 pm
My computer died, was revived and I am back again 🙂
Fantastic photographs! I have read about this trick but never tried it myself. Awesome results.
01/17/2018 at 3:05 pm
Pingback: » Blowing a Kiss Digital Lady Syd's Tidbits Blog