
HOW TO USE NIK’S SNAPSEED PHOTO APP ON YOUR SMART PHONE
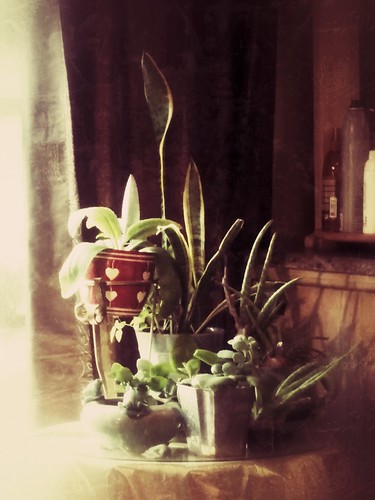 I am basically a Photoshop kind of gal, but I thought I would do a quick post on a wonderful free application from Nik Software called Snapseed – after all they do make some of the best Photoshop plug-ins around. Snapseed is by far my favorite photo app for my phone. Since I do not use an an IPhone but an Android phone, my choices are much more limited with what can be done on a phone – but Snapseed has so many options, I am not sure you need much more. The app does not appear to run any differently with either operating system. What I do like is that I have been able to get some fabulous results just by fiddling around with it on my phone, especially when I have few minutes to spare – therefore I thought I would just show you what results I got and a few things I learned about using it. Below are listed all the individual tools and slider setting amounts of the app. I found the app confusing at first without this info, so maybe this will help those of you who are familiar with the app, but still would like to know the settings. The image of the flowers in the window used the Vintage settings and was my first attempt using the app – it really is easy to get a beautiful effect.
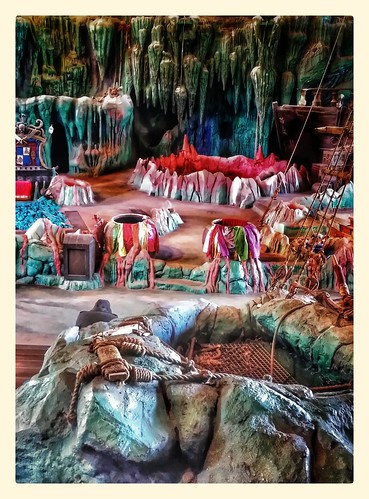
Since there is no history associated with the manipulated images, I have no idea what settings were used in several of my images shown here. The point is that it is really easy to get an effect you like by just sliding your finger across your screen and tapping icons. Google has a great link for all the questions concerning compatibility and image sizes with the various types of phones it can be used on so check out this help link. The actual app can be downloaded from your App store on your phone by just searching for Snapseed. The image below was taken at the Eighth Voyage of Sinbad Stunt Show at Universal Studios-Orlando. Lots of Detail Structure was added to this image.
 Some basics to know: Press the Question Mark (?) in each area to open an overlay on how to swipe on the image to get the different effects. Press the Mountain icon in upper right to see what the original image looked like. Whenever crossed arrows are available, keep tapping the icon for different versions of the effect being applied. Also, if you make some changes you do not like, press the X on the bottom left of each tool to remove effect instead of the checkmark to apply. If you totally dislike what you have done, there is an arrow in the upper left under the Snapseed symbol – press it and you can Revert your image to its original state. Now each tool is listed with some basic setting and information listed for each.
Automatic – Only Contrast ( 0 to +100) and Color Correction (0 to +100). Pretty basic sliders here and there are better ones below.
Selective Adjust – Brightness (-100 to +100), Contrast (-100 to +100), and Saturation (-100 to +100) choices – first must click on the circled Plus icon at bottom left center to add a control point and pinch and drag to size it for a specific area to adjust, then move sliders left or right. Note that there is a red overlay which indicates the parts of the image affected by the set control point. Another point can be added by just clicking on the Plus icon again and dragging and pinching in image. If you click directly on the circle, you will get a copy and paste option, if you click just outside it, you can change and move the sliders. This too is the best to use for localized adjustments to the image. Most tools are global adjustments.
Tune Image – Brightness (-100 to +100), Ambience (-100 to +100), Contrast (-100 to +100), Saturation (-100 to +100), Shadows (0 to +100), and Warmth (-100 to +100) – Wonderful options for perking up your photos, especially Ambience which can give a soft look to your images when set to a negative amount. It also balances out the exposure with some subtle contrast and color applied. The Shadows slider opens up the blacks like Shadows in Camera Raw does.
Straighten – Just a basic grid here that can be dragged in and out and the image can also be rotated 90 degrees around by clicking on the arrow icons at bottom. Use this tool first if your horizon is off.
Crop – In this section there is also a grid that can be dragged in or out or choices for different aspect ratios by clicking on the icon to the left at the bottom center. Set this to Original instead of Free if the image aspect ratio is to be retained. Use the icon on right of center to change from portrait to landscape or vice versa.
Details – Sharpening (0 to +100) and Structure (0 to +100) settings that both run from 0 to 100. Click on the Eyeglass icon left of bottom center to zoom in on an area to see results of the settings. It can be dragged anywhere in the image. I really love this feature. The Structure slider adds micro contrast and looks for edges – really a nice effect and different from Sharpening. Don’t add too much or it looks overdone, but it does wonders on pets and male portraits.
Black and White – Brightness (-100 to +100), Contrast (-100 to +100) and Grain (0 to +100). If you click on the icon to the left of center, depending on your which slider you are using, you get other presets like Neutral, Contrast, Bright, Dark, Film, and Darken Sky. If you click the icon to the right of center, you can choose from Neutral, Red Orange, Yellow and Green filters to apply.
Vintage – Brightness (-100 to +100), Saturation (0 to +100), Texture Strength (0-100), Center Size (0 to +100), and Style Strength (0 to +100). Click the Star at the bottom center left, and get 9 Styles that look like cross-processing choices. Click square icon on bottom center right, and there are 4 textures to apply to your image. Set Texture Strength to 0 and no texture is applied.
Drama – Filter Strength (0 to +100) and Saturation (-100 to +100). Press the Star icon on bottom left center and chose from presets Drama 1 , Drama 2, Bright 1, Bright 2, Dark1, and Dark2. Don’t overdo this effect, just apply what is needed.
HDR Scape – Filter Strength (0 to +100), Brightness (-100 to +100), Saturation (-100 to +100), and Smoothing (0 to +100). If you press the blue star Icon to the left of bottom center, there are preset: Nature, People, Fine and Strong.
Grunge – Style (+1 to +1500), Brightness (-100 to +100), Contrast (0 to +100), Texture Strength (0 to +100), and Saturation (0 to +100). A selection circle can be set on the image to direct the effect to a specific area. The icon on the right center bottom contains 5 texture presets which when tapped, show more variations, and the icon on the left gives a different look each time your press it. By tapping in your image, you can adjust exactly where you want the effect to be applied.
Center Focus – Blur Strength (0 to +100), Outer Brightness (-100 to +100), and Inner Brightness (-100 to +100). Tap in image to adjust where effect will be applied. Click Star icon to left of center bottom and these presets appear: Portrait 1, Portrait 2, Vignette, Blur, Old Lens, and Foggy. Press the small dot a default Weak effect is applied, or press the large dot and it is a Strong effect.
Tilt-Shift – Transition (0 – +100), Blur Strength (0 to +100), Brightness (-100 to +100), Saturation (-100 to +100), and Contrast (0 to +100). Press the Question Mark (?) in upper left if you forget the way to swipe the screen to get the effect. Click the blue Star on bottom left center, and you can choose Linear or Elliptical.
Retrolux – Brightness (-100 to +100), Saturation (100 to +100), Contrast (-100 to +100), Style Strength (0 to +100), Scratches (0 to +100), and Light Leaks (0 to +100). Press the Blue Star icon at bottom left center to reveal 13 styles and a Properties wheel which contains several more presets like Fine 1 and 2, No Leak, and Crisp 1 through 3. Press the arrow icon on the right and you can go through the different preset effects.
Frames – 23 frame presets are shown by pressing the picture frame icon on the bottom left center. Tap each frame to get several different variations for the frame selected. Press the Settings (wheel) on center right bottom, you can turn colorization or adding a creme color on and off.
 One of the recommendations is to apply the same effect twice if you like the results – just press the check to apply, then do the section again. It is especially useful for creating a vignette effect using the Center Focus tool. As an example of settings, the image above used the Crop Tool, Tune Image filters (Brightness -36, Ambience +83, Contrast -16, Sat -31, Shadows +15, and Warmth +41), and Center Focus (Blur +13, Outer Brightness -26, Inner Brightness +57, and set to Weak with control point on flowers with white centers).
 Since Nik has what is considered the best black and white plug-in for Photoshop, it is not surprising that Snapseed also gets some really nice black and white results. This image used the Straighten and Crop tools, Tune Image’s Ambience first and B&W afterwards to bring out the cloud effect. Center Focus was used last on the fisherman to help make him stand out.
Most of what I have learned using Snapseed is from this inexpensive E-book by Justin Balog called Snapseed – The Definite Guide. It is a great resource for learning how to use the the different tools together to get good image results. Another nice resource which is more basic and includes a nice workflow for using this app is called The Complete Guide to Snapseed Photo Editing App which contains several free videos by Emil Pakarklis. Snapseed will run on tablets and with a Chrome browser, which I had trouble getting to load so I am not commenting on this. I am surprised at how many of the feature that are part of the Nik family of Photoshop plug-ins have been included. If you like to take photos with your phone, I would recommend downloading Nik’s Snapseed from your phone store and start playing! Once again, it is a lot of fun – maybe not as much as playing in Photoshop, but still lots of fun!…..Digital Lady Syd

Pingback: » Adding Snapseed to a Regular Photo Digital Lady Syd's Tidbits Blog
Pingback: » Spring Flowers Digital Lady Syd's Tidbits Blog