
HOW TO CREATE A SUBTLE DODGE AND BURN EFFECT
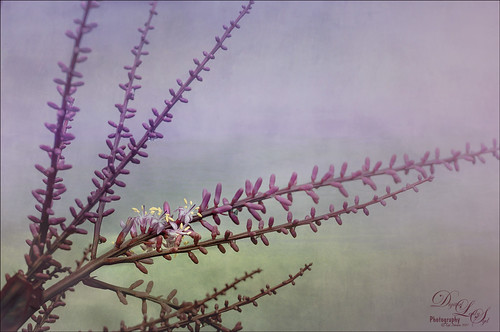 This week I am doing a little video on how I brought these tiny yellow flowers into sharper focus using one of my favorite dodging and burning techniques and show what a few of my other workflow techniques look like once applied. This image could have been used with several other textures or have been cropped differently for a totally look. I really liked the negative space and dreamy feel of the image, so I left it the way it was done for the video. Links to more information are provided below. Here is the video:
Here is a list of places that will give you more info or where you can get more information on some of the techniques or resources presented in the video:
- Lightroom Preset called Hazy Days 17 by 2 Lil’ Owls – See sidebar at my Tidbits Blog for website link, she has a lot of great Lightroom presets besides her gorgeous textures.
- My Fun Photoshop The Best Dodging and Burning Technique blog – basically same technique as presented in the video except that a black brush color is used to burn instead of sampling a dark color from the image.
- I Qwillo Brush from GrutBrushes.com – keep checking back on Monday’s on Nicolai’s site for a free brush each week – love his brushes!
- Adobe’s Paper Texture Pro – free panel that can be added into Photoshop to quickly add and change textures layers to your images – very useful.
- My Fun Photoshop How to Add a Spot of Light blog – the blog used a technique by Corey Barker, but Pratik Naik uses the same technique with the soft round low flow brush – try this brush in different colors to get some interesting effects.
- My Fun Photoshop How to Use a Black & White Adjustment Layer to See Contrast in an Image blog – should use this technique on every image to make sure your focal point is standing out.
- My Fun Photoshop Yet Another Great Way to Create a Vignette! blog – same technique used in the blog except the Gradient Editor was opened and the gradient color changed from black to a soft purplish color in the bottom left tab. Blake Rudis came up with a brilliant idea here!
If anyone has questions on some of the procedures performed on this image, just drop me a question in the comments below and I will go over it more clearly. This was a pretty fast pace for describing all the steps followed in this image. Hope everyone has a wonderful weekend and Happy Halloween!…..Digital Lady Syd

Hello Lady Sid, I love your weekly posts. Yesterday’s post, however, was missing the link to the video. Many thanks! Marek
Sent from my iPad
>
10/29/2017 at 12:15 am
Thanks for letting me know – I hope it is working now. I had a problem getting it set in You Tube.
10/29/2017 at 7:51 am
Pingback: » Harvesting Orange Digital Lady Syd's Tidbits Blog
Pingback: HOW TO USE LINEAR DODGE (ADD) & LINEAR BURN BLEND MODES ON IMAGE | Digital Lady Syd's Fun Photoshop Blog
Pingback: HOW TO DO A BASIC DODGE AND BURN WITH A TWIST | Digital Lady Syd's Fun Photoshop Blog
Pingback: REBOOT – HOW TO USE LINEAR DODGE (ADD) & LINEAR BURN BLEND MODES ON IMAGE | Digital Lady Syd's Fun Photoshop Blog