
Digital Lady Syd Reviews Smart Photo Editor Photoshop Plug-In
 It has been a while since I did a review on a product that is totally new by a company I have never heard about but that is what I am doing! Anthropics Smart Photo Editor can be used as a Photoshop plug-in, although as a stand-alone program it is a fairly powerful photo editor in it’s own right. My interest is its use as a plug-in for all the special and crazy effects I love to use. This program definitely “fits the definition” with an incredible amount of variety! Even though I just bought the program, I thought I would pass along what I have learned, what I like, and what I do not like.
The top image was taken at the Orlando Airport at the Harry Potter Store using my Android. Here are the settings used for this image: Created a layer mask to mask the background. Then applied Soft colored texture 017 by andrewb2012 – applied it to just the background. Saturate and Glow was applied to just the trophy and books, and then applied Oil painting by Vivienne Li was applied to the whole image. Applied Stacked photos landscape format 001 by andrewb2012. See the screen shots below for some of the steps used.
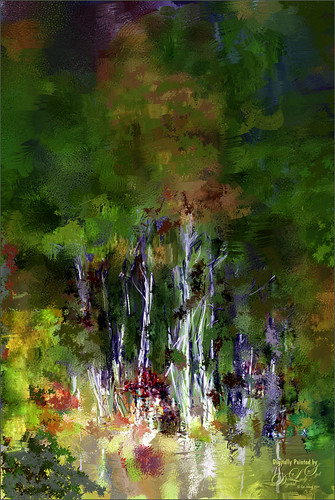 The tree image was taken in Tennessee several years ago. It was first painted in Corel Painter and then in Photoshop the Smart Photo Editor was opened and just one preset called DJ Philip was used to give the final nice effect. (Here are the settings for the preset: Fade was about 2/3 of the way over, Merge 0.568, Filter 0.628, Radius 0, and Gradient 0.458.) The preset basically just darkened down the top part of image to direct the focus a little lower in the image – very subtle effect in this case. The results are added to your highlighted Photoshop layer by clicking File -> Save and Close.
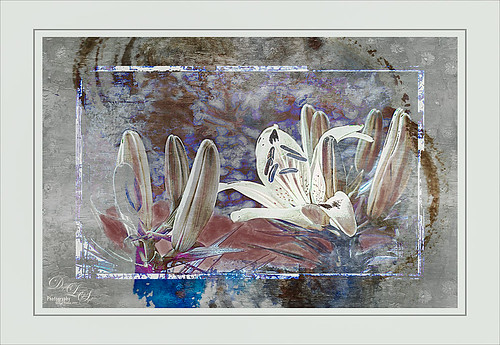 Just another example of a very simple application of this plug-in – these day lilies were actually a very bright yellow but by taking this image into the Smart Photo Editor, an interesting effect could be achieved. The Bittbox-grungy watercolor01 border preset was applied. Back in Photoshop colors were tweaked a little more by using a Hue/Saturation Adjustment Layer and then doing a little painting clean up. Once again a very quick result that turned a rather ordinary flower image into something quite different. Below are two screen shots – the first showing the Effects Gallery and the second showing how a mask is created to selectively apply the effect. Click on the image for a larger view in Flickr.
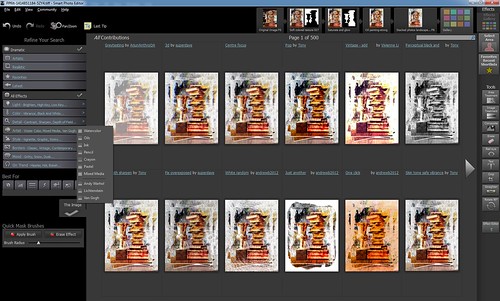
 Just have to remember that if an effect does not look right, you need to Cancel and then click the Effects Gallery icon again in the upper right to select a different effect. The right and left arrow keys will advance the grid right or left if you do not want to click the big arrows with your mouse. To see your original image, press F5 and to see what difference from the last effect press F6.
What I Like About Smart Photo Editor:
1. The Effects Library with this wide variety of effects to apply to your image – there are Light, Color, Detail, Artist, Styles, Borders, Mood (weather effects), and Trendy effects that can be applied. It appears that the presets are obtained from the internet so when you open up the plug-in – thumbnails are created to show you want the different effects are. (See Gallery screen shot below.) A Search field aids with finding the effect you want. Also the best effects for your image appear first.
2. The ease with which the total effect can be applied – pretty much just a click or two for applying any preset. Also, there is a Favorites Recent Shortlists button that list the last 20 effects you used – very handy!
3. I really love the borders that can be applied. Ever since OnOne retired PhotoFrames, I have been at a loss to find really nice quick frame effects. This program fills that void.
4. That the program can be used as a photo editor for RAW files – you do not have to use it in Photoshop. It seems like an affordable way to process RAW files without owning the more expensive software to edit them. I checked this out on an image and it worked great with my Nikon camera NEF Raw file. There is an Image Treatment icon on the right side that has a whole bunch of basic image adjustment sliders like in ACR or Lightroom.
5. Can create your own presets for use over and over and can even upload them to the Smart Editor Community for others to use. Also, you can easily open up an existing preset to remove a border effect, for example, or add a different one in if you want to change it. This is really a cool concept!
What I Do Not Like About Smart Photo Editor:
1. Once an effect has been applied, as far as I can tell, you cannot try different effects on the original image to decide which you want. It stacks one effect on top of another one. I may be wrong on this, but so far I am having trouble doing this.
2. Sometimes it is hard to tell if the sliders are making changes when adjusted.
3. It is not easy to use the layer mask, but it actually does a pretty good job with a little practice – need to press SHIFT key to select other areas and ALT key will let you remove areas that got selected (turns it to the Erase From Selection button). I am not sure if the layer mask can be copied to another effect so you get the same mask unless you start out by selecting the Select Area button. Just not as easy as adding the layer mask in Photoshop and painting out what you want. Also I don’t believe there is an opacity slider for the brush so the effect is either in the image or not in the image.
4. Cannot be used as a Smart Object – not that big a deal but it would be nice to get back to your settings.
Bottom Line
This is a pretty good plug-in to get, especially if you need a quick effect for an image. The image can be adjusted using all kinds of regular photo effects for color, vibrance, detail, etc. It also allows Overlays and Underlays to be applied with blending modes and opacity slider. The price is reasonable, especially when bought just as a stand-alone program. I totally love the bordering effects so for me it was a no brainer – get the plug-in!
 This image was taken while on The Land ride in Epcot, Disney World, Orlando, and the fish were just a rather plain white color. The Smart Photo Editor was opened and presets were applied. (The Texture my world preset by andrewb2012 was applied. Next applied Watercolor, texture & vignette 001 by andrewb2012 – Master Fade just past middle, Merge 0.631, 3 Way Combine 0.277, Exposure 0.535, and Saturation -0.151. Selected to add mask and painted off effect from middle fish.) Then in Photoshop just some Sharpen Tool to the eyes was applied. I thought this was a very interesting effect that took just a few minutes to create.
I would suggest you download the trial and check it out. If you download it, they have a very nice website with several tutorials and a community forum. I would suggest you watch this 2:46 minute video for a brief introduction to the program and one I found most useful before starting. It is called The Fisherman Enhancement (2nd video down) and goes through most of the main features quickly. Anthropics had a very good price offer going recently and I am sure they will be offering it again with the holidays nearby. I was pleasantly surprised how versatile this program is and will be presenting more of its effects in the weeks coming up.
Hope you get a chance to experiment with this interesting plug-in. It might be something that you will really like!….Digital Lady Syd

Dear Syd. Thank you for this blog. I will definitely try Smart Photo Editor on a trial basis. I hope that, unlike Impressions, I have enough computer ram to use it. I’ve already converted my computer to 64-bit but would need another graphics card to use Impressions.
Sharon Scott
11/02/2014 at 7:04 am
Thanks for the comment. I agree about Impression – it runs slow on my computer as I have a very old graphics card. Figure my computer is on its “last legs” so waiting to upgrade. That said I am having no trouble with Smart Photo Editor – it takes a little while to render after doing a Save and Close, but it is not that bad. I was pleasantly surprised that it was not a RAM hog!
11/02/2014 at 4:53 pm
Pingback: HOW TO USE A PHOTO FRAME MASK | Digital Lady Syd's Fun Photoshop Blog
Pingback: HOW TO COLORIZE AN OLD PHOTO | Digital Lady Syd's Fun Photoshop Blog
Pingback: PAINTERLY PLUG-INS – SO MANY CHOICES, SO MANY CHOICES! | Digital Lady Syd's Fun Photoshop Blog
Pingback: PAINTERLY EFFECTS | Digital Lady Syd's Fun Photoshop Blog